Pages

Showing posts with label baby. Show all posts

Wednesday, 18 April 2012

Cloth diaper tips

If you are using or thinking about cloth diapers here are some things I have learned along the way.

Make sure you as a parent like and feel comfortable using the diapers you have chosen.  You'll be changing them often.  For us I use cloth but my husband uses disposables since he can't figure them out.

Shake out the extra poop.  It help with the clean up

Get a diaper pail that works for you.  There are many systems.  We use a very simple pail with a lid that can lock on.

Every so often do an extra rinse with vinegar it will help to cut bacteria.  Baking soda added to the wash is also helpful.

Use soap designed for diapers.  We started with Claudia's Choice for all our laundry.  Now we make our own and it has been fine so far.

Air dry diapers.  Sun dry if possible.

Give baby's bum lots of air time too.

Make cloth wipes.  Since you are washing the diapers anyways it makes sense.  You can simple cut up an old shirt or receiving blanket or use designated wash cloths.  We diaper in the washroom so the sink is close by, but you could keep a spray bottle handy to wet the wipes.

Happy diapering!
My stylish diaper boy

Tuesday, 17 April 2012

Our cloth diaper decision

When I was first pregnant I was totally grossed out by the idea of cloth diapers.  I mean who wants to store poopey diapers in their house and then run them through the wash?!  However once I met a few people who used cloth diapers I began to think again.  TJ suffered through many terrible diaper rashes and was extremely sensitive to comercial whipes.  When he was very young I began to make our own disposable wipes.

Our Kushies diapers
I had looked into a diaper sercive.  These can be an excellent option if you are interested there may be a few in your area.  For me it wasn't a cost effective solution since disposables on sale are cheeper still.

When I came around to the idea I was all excited but TJ was now into training pants.  We chose to go with Kushies because we live near the outlet and factory so I got a good deal.  They are also readily available at Walmart for a good price.  It only made sense because he wasn't having too many accidents so why keep throwing out rraining pants.  He also trained faster because he could feel when he was went and felt like a big boy in undies.
MJ looking so stylish
When MJ was born I started with Kushies again but was really wanting something else.  I tried making my own and using a store bought outer wrap but it was quite bunchy for us.  Not the wrap just my own homade liners.  I would have loved some of the fancy brands out there but the cost was way out of our budget.  Finally I discivered Cozy kids.  They are just like the expensive kind but not sold so commercially so the price was right for me.  THere are many brands that are like this so I suggest you look for something in your area.  We love our cloth diapers and I don't regret the decidion at all.

Cloth diapers can:
Reduces waste
Save money
Healthier for baby's bum

Come learn more about cloth diapers over at The Great Cloth Diaper Change and the Diaper Week Blog Hop and The Eco Chic.

Wednesday, 20 April 2011

Drool Bandana

I know I was planing to catch up on all my half made projects, but this was too cute and so simple to make.  MJ is teething right now and all his bibs are getting dirty (or they are in the wash).  I've seen these cute drool bandanas on Etsy before.  I'm all for making things if I can do it for less.

I took 2 pieces of material and cut a triangle 17inches along the bottom and 5inches up the middle.
Sew them together and add a fastener!  Easy right?!


I chose to add a layer of polar fleece in the middle of mine to make it more absorbent.  I also used cotton on one side and flannel on the other.  This is because I was using scraps.

As I write this I'm realizing I need to make a few more because MJ's shirt today is already soaking wet.  I'll try o post more pictures of this soon.  Be creative and happy sewing.

Saturday, 2 April 2011

Upcycled Sleep Sack

I don't usually blog on the weekend, but I was crafty today and didn't want to wait until next week to share with you all.

I came across this idea from lovinthemommyhood about making a sleep sack from a men's dress shirt.  The original tutorial is from The Cottage Home along with some other incredible tutorials.  I encourage you to check out both of these blogs!

The Cottage Home


The reason I made a new sleep sack for MJ was... I just wanted to try out this tutorial, and because he is outgrowing his old one.  My niece is currently using our next size up. MJ is about the same size as his older cousin, so I had a great excuse to try this out!  Now my wonderful husband doesn't wear dress shirts on a regular basis (he owns two for suits), so I headed over to the Walmart clearance section.  Oh my lucky day!! I picked up two ladies night shirts for only $3 each.  I also got some great kids clothes for gifts...

I mostly followed the tutorial but made a few changes.  I used the full length of the night shirt as MJ is wearing size 18months (he is only 9months old).  I also used the full width of the shirt, so I had very little sewing to do.  On the light blue one I used white bias tape.  On the darker one I used double wide navy bias tape.


Unfortunately for me I traced MJ's old sleep sack that I also made and the arm holes are way too big.  I'll just sew them up and take in a little at the sides tomorrow.  I'd love some ideas for how to decorate them a bit more as they are rather plain.


Have a great weekend and I'll see you next week!

Wednesday, 30 March 2011

Wednesday: Diaper Pouch Tutorial

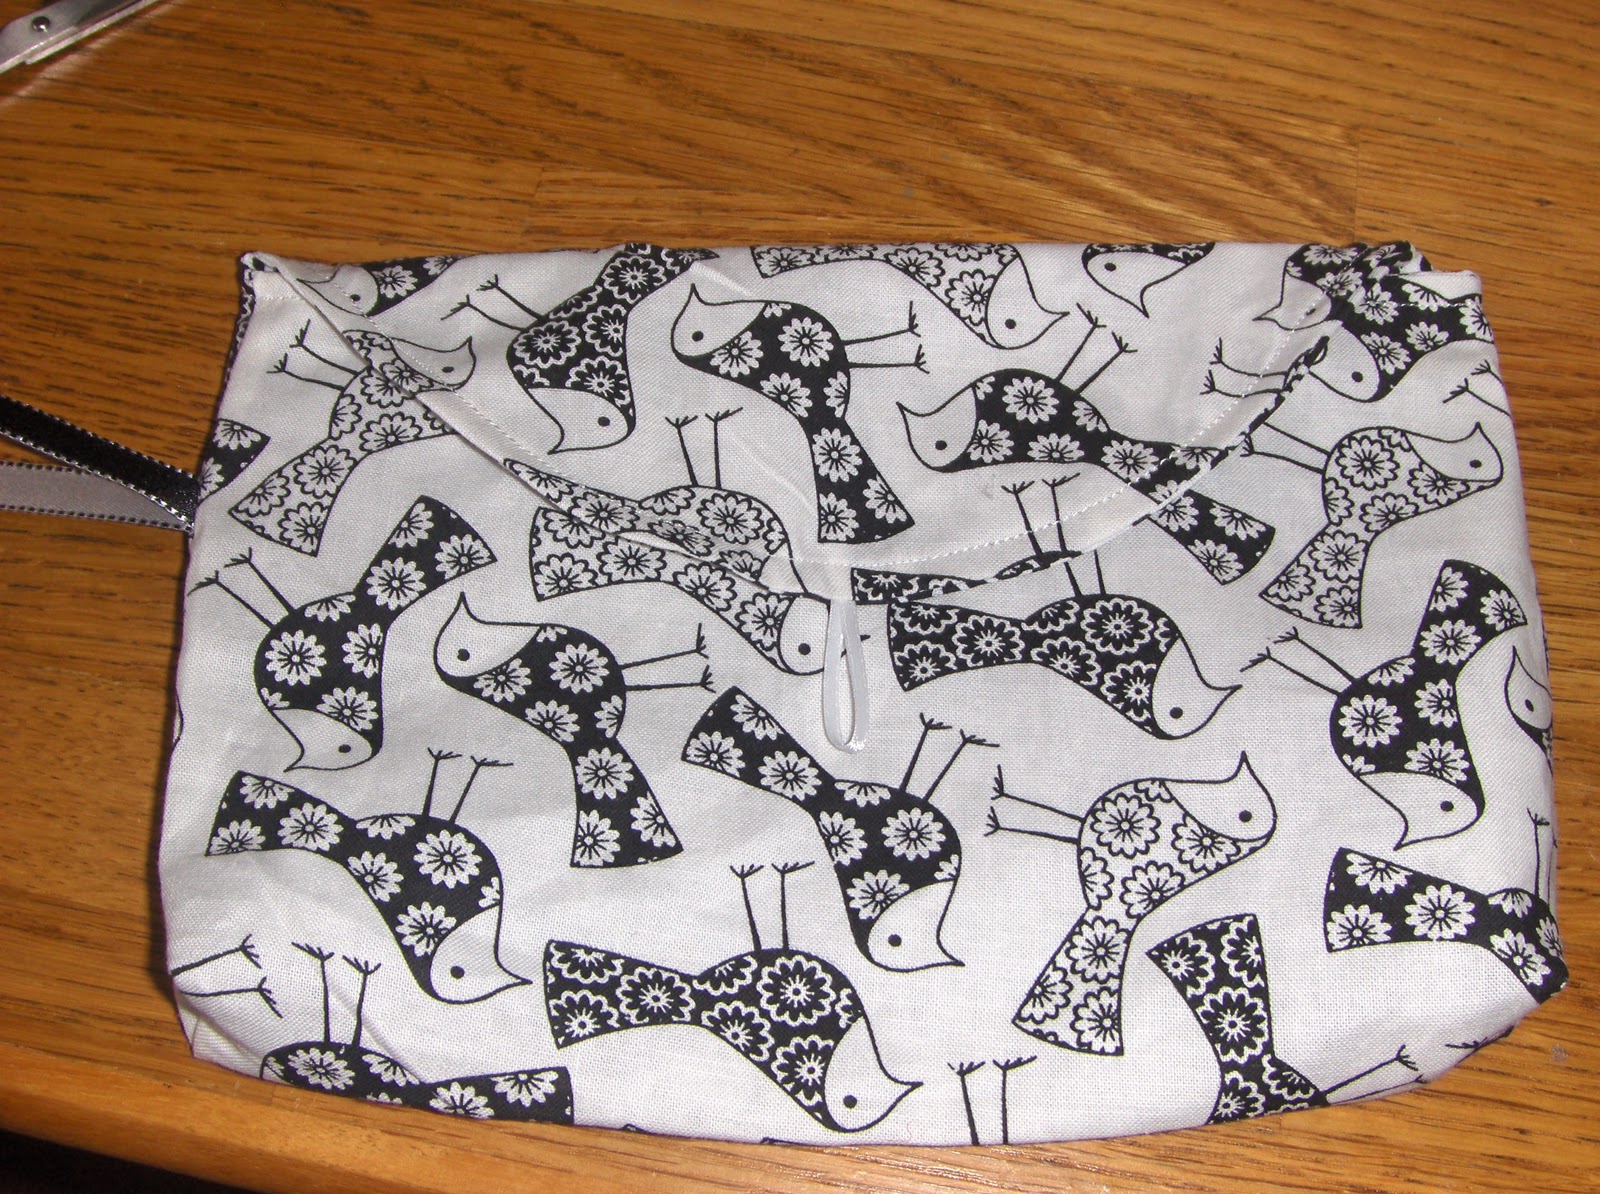
I went to Fabricland with my mom last week.  We had a great time together.  I absolutely fell in love with this material, so I bought some.  My friend had shown me a pouch she bought to hold a few diapers and wipes.  That way you just move the pouch to your purse when you want to go out quickly.  My younger sister is gonna' love this material too, so I made her a little something.


First I measured two rectangles approx 9 1/2 inches by 15 /12 inches.
I used a small dinner plate to make one end of each rectangle rounded.  This will be the flap to close the pouch.

Next I cut a small rectangle from the coordinating fabric for a pocket.  This was about 4 1/2 inches by 6 inches.   Fold under the edges all the way around for this pocket and sew.

Pin the pocket to the material you'd like to use on the inside.  Place it below the flap.  Sew around three sides.

On each of the large rectangle pieces, fold up the edges, pin and sew.  Keep in mind to leave an opening in one to turn it inside out (I usually leave a gap on the inside piece)!!!

On the outer pieced I also added a ribbon to use as a handle.

Now at the bottom edge of each pouch shape, cut out a small square (about 1/2inch).  Squeeze it open, match the opposite sides and sew in place.  This will give some shape to the bottom.

With right sides facing, pin and sew the two pouches together.  You may wish to add a small loop at the top for closing the pouch.

Turn right side out and iron the piece.  Next I chose to sew around the edges of the opening.
I just need to add a button to close (you could also use velcro, or a snap).  Tada!!!

This should hold a few diapers and some wipes.

Let me know what you think of this tutorial (it's my first).

This is also posted on:
A Vision to Remember


Photobucket

UndertheTableandDreaming

Tuesday, 15 March 2011

Tuesday's Tips: Diaper Pail Pucks

It's Tuesday and time for some handy times and things I've picked up along the way.  I'm really not sure where I learned about this.  I think I was doing a search online to make our diaper pail less smelly.  You can use this idea for any garbage can too!

Okay so here is what you do.  Pour a large amount of baking soda (about 2 cups) into a small bowl.  Then add one table spoon of water at a time.  Stir until you have a thick paste.

Line a muffin tin with muffin cups.  Scoop your thick paste into the muffin cups and let them dry.  This might take a day.

When you are done, you can store them in an air tight container.

To use them just remove the muffin liner and place in your garbage pail.  Mine has a built in spot for deodorizers.

Good luck!