Pages

Showing posts with label Holidays. Show all posts

Monday, 29 October 2012

Fall Harvest Party

This past weekend we had a Fall Harvest Party.  In our wonderful stories (see resources below) Super Sam and his friends had a fall harvest party so we decided to have one too.  All month long the children followed along with Super Sam's adventures and also created their own invitations, snacks, decorations and games. On Saturday morning cousin E and one of our daycare girls came to celebrate in the fun.  Unfortunately not everyone was able to attend, but we still had a great time.

Welcome to the party

Fall Nature Table

Yummy treats

Bowling Squash

Pumpkin bean bag toss

Decorating coffee filters as jack-o-lanterns

Circle Time

Fall decorations
Dressing Up

Fall sensory bins

We are using Waldorf Essentials kindergarten curriculum that comes with their Thinking Feeling Willing program.  I can't say enough about how amazing Melissa is.  The children lessons are adorable and all the kids love Super Sam.  The mom lessons have taught me so much about Waldorf I feel much more prepared to homeschool now.  Of course the support from Melissa is invaluable and always so helpful. I do encourage anyone new to Waldorf or needing some help to check out this program.

I am really excited about the rest of the fall and into the winter.  We will continue to use the Waldorf Essentials and also have included some wonderful themes from Seasons of Joy Winter.

Check out the giveaway at Seasons of Joy this week and join their link-up!!

I'll be linking up throughout the week:

Waldorf Wednesday at Seasons of Joy
Happy Family Times
Natural Suburbia
It's Play Time


Tuesday, 2 October 2012

Gift Giving (never too early to start planning)

As many of you already know we are trying to move towards a simpler more natural lifestyle (Okay I am and everyone else is along for the ride).  That being said our gift giving and wish lists are changing too... a little.
Mini stockings for our advent calendar
I do hope this post doesn't offend or bother anyone (I hate conflict), I am not trying to push our wish list on family members (although Christmas is coming!!), but  wanted to share some fun ideas with everyone.

To start with, I want to recommend Wishlist.com.  It has been a great way to keep track of items we want throughout the year.  There is also a little app button you can put on your internet bar so when you see something you like from any page you can ad it to your wish list.  I currently have three lists

My boys http://www.wishlist.com/1124087/timothyandmatthew/

Homeschool/Daycare  http://www.wishlist.com/1124087/schoolanddaycare/ 

Me http://www.wishlist.com/1124087/meaghanjackson/


Used craft time to make a Father's Day Gift
I know there are so many blogs, lists and Pintrest ideas out there.   Below is a list of inexpensive homemade ideas for kids. Some have links.  You don't need to be super crafty, a simple glue-gun could do most of these.  Also check out the crafts, activities and project on my side bar for more.

Play dough kit - homemade play dough and some accessorize
Fort kit - bed sheet, ropes, big laundry clips
Baskets of natural items - rocks, pinecones, sticks, shells
Dress-up clothes - no need for a full costume just some accessories or head band with ears will work
Play silks- you can go fancy or just put a hem on flowy pieces of material
Nature bag - a simple draw string bag is perfect to collect nature items with
Puppets - again you can buy some or make simple sock puppets (fun to make with the kids), you could give a child a kit of supplies to make their own.
Tree blocks - get a thick branch and cut into various lengths.  Most of ours are about 1-2 inches tall
Wooden blocks - we took the end pieces from our last reno and cut into different lengths, they have been outside all summer and fall.
Felt board - simply cover a piece of cardboard in felt, then cut your own fun shapes out.  We printed a paper doll set and cut it out of felt for dress up, you could also make different face parts...
Mail - unfold a paper envelope and trace onto felt, cut it out and glue up the sides.  We used cut up old cards and some stiff felt to make the mail inside.  You can glue on velcro dots and make different names and stamps too.
Roads - simply cut lengths of denim from old jeans.  You can sew up the sides or just leave them.  I painted a line down the middle and made a parking lot piece.
Bean Bags - think simple like an old pair of socks stuffed with an elastic on the end, or make a rectangle from material and glue up the sides. I made a set out of an old winder coat, you could knit some nice ones too.
Sensory Bins - how about a shallow box with bean, pasta, rice, accessories for a gift.  Water beads are also popular this year. You could even make up themed ones to swap with friends.
Re-gift - each year my boys pass a long a few books to their cousin as their gift to her.  We choose ones in good condition.  You could also pass along other toys to a friend, relative or donate them too.
Thrift Store - kids don't notice if a toy is new or not.  Last year we bought several different used sets of tracks and put them together in a fabric bag.  We also got a really nice metal digger for the sand box in good condition.  Besides then you don't have to spend all morning trying to get the toys out of the boxes.  Be creative with how you present them.
Sock monsters (MeAgainCreations still has a few left)
This year we will most likely be giving homemade gifts too. Here are some ideas for adults. 
  

Notecards - This one is also for adults!!! Use blank note cards or card stock and decorate.  Simple stamps an some trim are very effective.  I used old holiday cards too.  Last year I made a large set for different family member including different holidays and occasions.
Baking - need I say more?!
Frozen dinners - double what ever you are making and save some as a gift.
Time - I can tell you how much I'd love time to go out or have some time.  Consider babysitting even just once for someone.
Kids crafts - if you are at home crafting with your kids, use it as a time to make gifts for others, there are plenty of cute ideas out there.
Wrapping paper - use your children's artwork as wrapping paper! I also made a set of reusable gift bags to cut back on paper waste.


I'll try to update this with more ideas as we go along.  Please do share your ideas in the comment box.


Sunday, 13 May 2012

Handprint flowers / Mother's Day

Happy Mother's Day!

Her children arise and call her blessed; her husband also, and he praises her, "Many women do noble things, but you surpass them all." Proverbs 31:28-29

The week around Mother's Day is always very busy around here.  My Uncle (May 7), TJ (May 9) and my husband (May 14) all have birthdays.  It is also Mother's Day in there too.  We often have one get together to recognize all the events. The boys and I made these sweet pictures for my mom (for Mother's Day) and my Husband (for his birthday).
To make them I painted the boys hands to make the flowers and the leaves/grass are finger prints.  You can use any paint and paper you like.  Daddy's gift is on a canvas, while Nanny is on card stock.  I have also seen on people use foot prints for the leaves, which is another great idea.

Don't worry about extra little smudges or finger prints.  They make great bugs if you add wings!

 Clean up was a breeze.  We did the craft outside and I let the boys paint themselves.  We got out the kiddy pool and some dish soap.  The boys had a great afternoon playing in the sun!


After the pictures dried I convinced the boys to let me take a photo of them together.  It is hard to get them in the same shot and looking (this was after 5 attempts).  I also added the poem below to the back of the pictures.  I got this poem from a craft we did several years ago at an Ontario Early Years Centre with TJ.
 Fingerprints
Sometimes you get discouraged,
because I am so small
And leave my little fingerprints
On furniture and walls.
But everyday I'm growing
And soon will be so tall
That all these little fingerprints
Will be difficult to recall.
So here's a little handprint
That you can put away
So you will know how my fingers looked
On this special day.
~Author unknown


Sunday, 8 April 2012

Happy Easter!

Wishing you all a Happy Easter! We had a wonderful day today with a visit from the Easter Bunny, church and dinner with my family.

This year I made Easter baskets for the boys knowing that other relatives would be blessing us with lots of chocolate.  I made some baskets for the boys and sun hats for the summer.  I already have some great ideas for next year from other blogs. The Easter Bunny snuck into my closet and hid the baskets somewhere in the house.  We were left with some photo clues to find them.
TJ's basket has a hat, crayons, game, gardening gloves, large laundry clips, and a Kinder egg.  He wore the gloves the entire day only to take them off for his snack at church. The crayons are for his quiet time with me as we are beginning some Waldorf curriculum I found online.  We made a fort with the large laundry clips too! MJ's basket has a hat, toothbrushes to share, paint and brushes, a Kinder egg and memory game.  The memory/matching game is made of fabric scraps.  MJ can't wait to get painting as soon as he can.

 The Easter bunny left a note with our stuffed animals explaining that he'd added to our baskets (TJ had seen the baskets and hats previously) and hidden them.  The boys followed photo clues left around the house and yard with stuffed friends to help along the way.  There was much laughter and shrieking as we ran all over looking for the baskets.
 After we found our baskets we sampled chocolate and played with all the goodies.
After nap time we went over to my parents.  The kids had a great time looking for eggs as did the adults. My mom hid some eggs so well there may still be a few to find.  she also left some clues for the adults to find some yummy treats.  Dinner was delicious with a lamb, ham, veggies and desserts.  The boys and I made a cake and sugar cookies.  We also made a special nest for the hard boiled dyed eggs we made the other day.  Now we have put most of the chocolate away from our reach and are waiting for TJ so get down from his sugar high (he also had a nap today so he'll be up later).

Happy Easter to all I look forward to hearing about your weekend.

Thursday, 5 April 2012

Natural Dyed Eggs and other Easter Crafts

Oh the fun times we all have when sisters and kids get together!  I had a great time hanging out with my sisters yesterday along with my younger sisters children.  The boys had so much fun with their cousins too.  TJ spent a long time playing with his little cousin during MJ's nap.  It was good to see him engaging with her and playing gently. Baby James is growing so quickly too I can hardly believe it.

Easter is fast approaching so for a fun activity we made these interesting natural dyed eggs from The Chocolate Muffin Tree.  Our plan is to use them as a table centre piece for the family Easter dinner (and eat them too).
Our dyeing material spinach, blueberries, raspberries, rice (for texture)

Filling a pouch with ingredients

MJ loved scooping all the food, and eating the rice bits

Cousin E was very thoughtful about what she wanted and where to place it

Results were paler than expected but still interesting

The blue line came from some tape we had wound around the egg

Here are some other Easter crafts we have made this week.

Crayon resist / water painting eggs

Collage palm leaves for Palm Sunday

We made a banner from the coffee filters we decorated last week.
Come join us and see what else we have been doing.  I'd always love for you to share your ideas with us.

This post has been linked to IT'S PLAY TIME Go check out some other great ideas!
For the Kids Friday

Monday, 2 April 2012

Egg Experiments

You have to go over to either The Chocolate Muffin Tree or Tinker Lab to check out their amazing Egg Week activities.  This week the boys (mostly TJ) and I tried a few with great success!

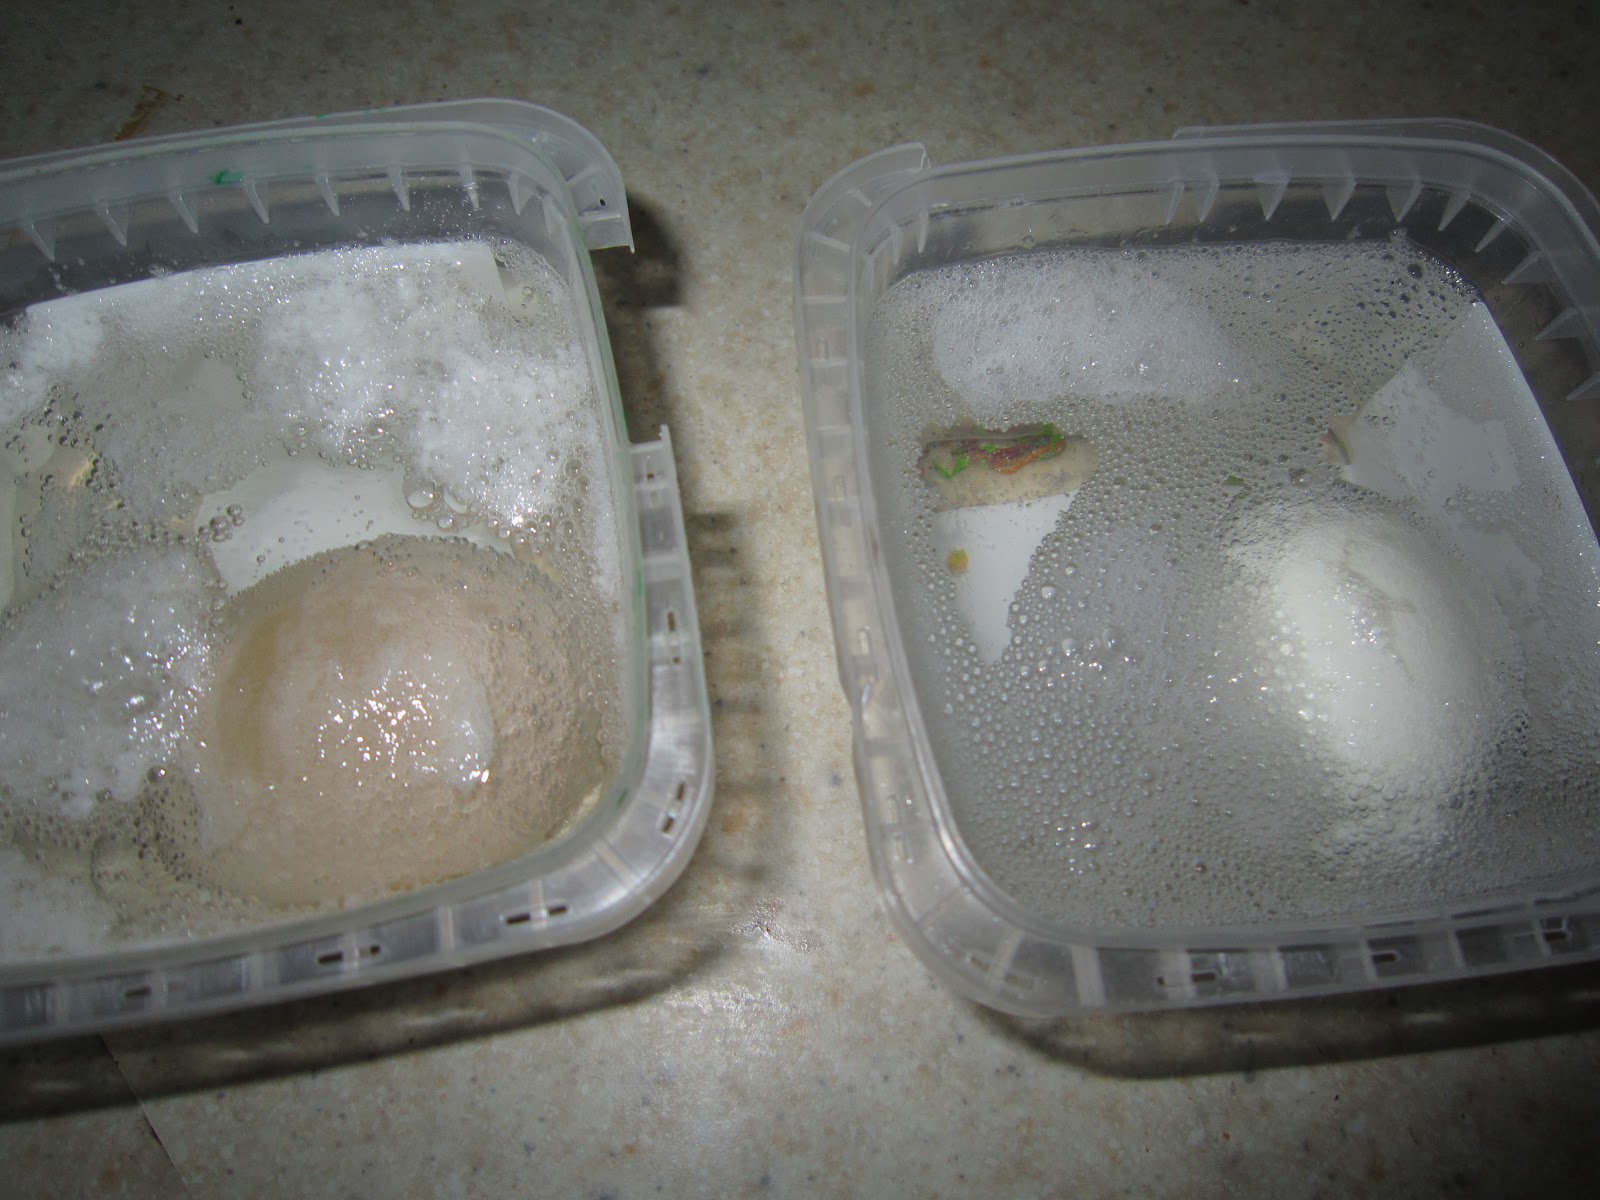
We first did the Transparent and Bouncy Egg experiment.  We just simply placed a raw egg and a hard boiled egg into a container of vinegar and waited a day or so.
Our eggs in their containers.  The froth is the shells that dissolved.
TJ and I compared the differences in size and texture.  We gently squeezed the eggs and bounced them.  After that we went to the leaf pile to drop the eggs harder.  The raw egg splattered easily but the hard boiled egg needed to be bounced twice before it broke.  Very cool!
Our eggs after the experiment.  Look at the differences!!
Next we also made Egg Geodes using some different things from around the house.  I showed TJ pictures of what should happen to our eggs.  We then made predictions about what our eggs might do.
Egg Geodes at the beginning (Salt, Sugar, Borax, Washing Soda)

TJ's predictions (Washing Soda makes biggest chunks, Borax makes smallest chunks)
We waited a few days to check out our results (not without a lot of peaking).  Here is what we came up with.
Our reults

Washing Soda had impressive crystal results

Salt had crystals forming on the outside

Borax had some residual crystals at the bottom


I wanted to share this with you early in the week so that you could try some too.  We plan to make some natural dyed eggs later in the week with our cousin.  We may also have an egg and spoon race with our knit eggs or some hard boiled ones.

What are you doing with your eggs??

Wednesday, 14 March 2012

St. Patty's Crafts

Oh the fun we have had with all things green. As you can see we went on a "green" treasure hunt and gathered up anything green we could find to decorate the mantle. There are kitchen items, toys, books etc. Then we made some fun crafts.

Marble painted lucky clovers

Materials:
paint
marbles or small balls
container with lid
paper
tape
spoon
bowl
paper

Directions:
1. Pour some paint into a bowl, add the marbles
2. Tape your paper to the bottom of the container
3. Using a spoon or ladle, scoop some balls with a bit of paint into the paper

4. Snap on the lid and shake, shake, shake
5. Open up and marvel at your work.  Then make some more.
6. Once dry, trace a shape onto the back and cut out.
TJ hung them in every direction all over the house
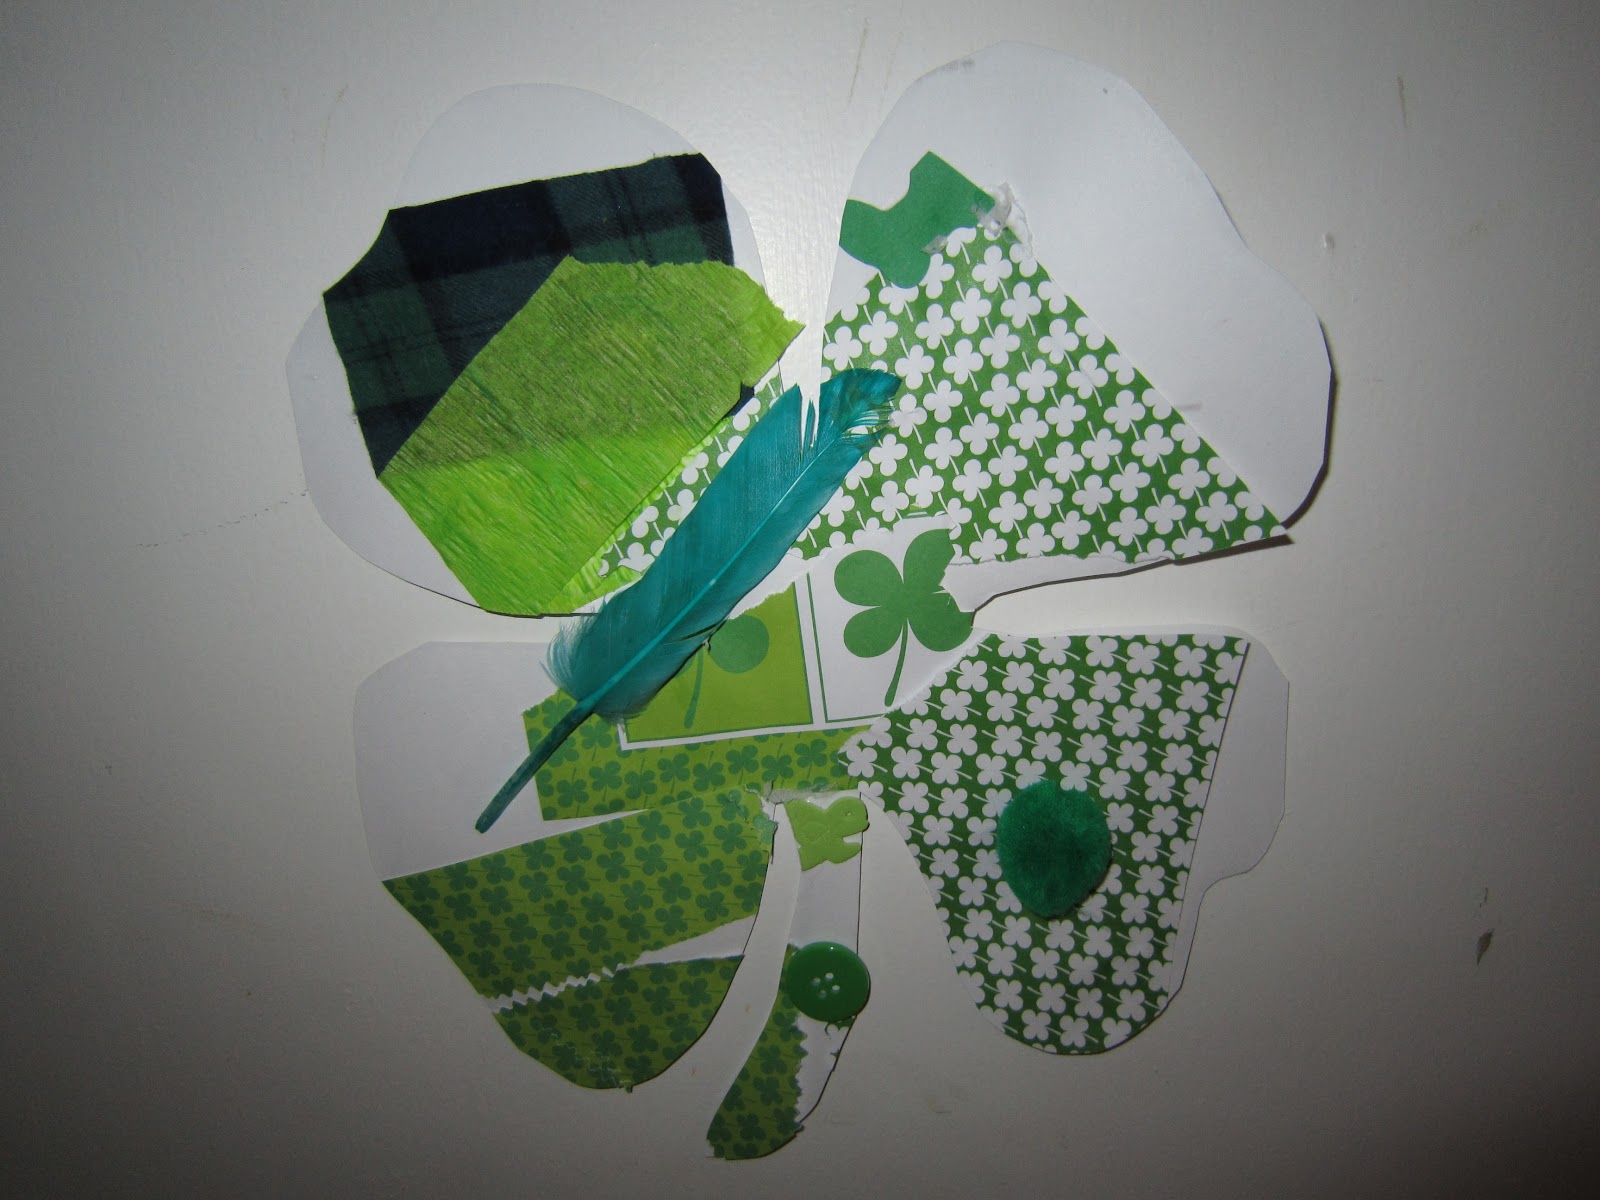
Last week the boys got together for a play-date with some friends and we had a great time making these green collages.

Green Collage

Materials:
green art supplies
glue
card stock or heavy paper
scissors

Directions:
1. On card stock print or draw the shape of a clover (or any shape you'd like)
2. Gather up any green craft supplies (paper, tissue, pompoms, sequins, foam sheets, stickers...)
3. On the back side of the paper let your kids glue all sorts of green things
4. Once dry cut out your shape and enjoy
MJ and I made this decoration for his door

TJ liked his full collage and didn't want it cut up
On St. Patty's day we are planing a green meal and some other fun things.
How are you celebrating?

This post is linked to It's Play Time.  Go check out all the other amazing fun activities!